Design Tips for Container Gardens Quiz
Test Your Knowledge
Question of
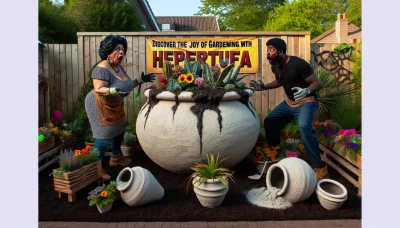
Design Tips for Container Gardens
Container gardening is a versatile and accessible method of gardening that allows individuals to cultivate plants in various containers instead of planting them in the ground. This approach to gardening opens up a world of possibilities for both novice and experienced gardeners alike, making it a popular choice for many. One of the primary benefits of container gardening is its flexibility; containers can be placed on balconies, patios, and even indoors, making it an ideal solution for those with limited space. Additionally, container gardening offers enhanced control over soil quality, moisture, and exposure to sunlight, which can lead to healthier plants and higher yields. Whether you're looking to grow decorative flowers, herbs, or vegetables, container gardening provides an accessible and rewarding way to enhance your living space with greenery.
Choosing the Right Containers
Selecting the appropriate containers for different types of plants is crucial for their health and growth. The material of the container can significantly affect the soil's temperature and moisture level. For instance, clay pots are porous and allow air and water to pass through, which can be beneficial for plants that prefer dry conditions. On the other hand, plastic containers retain moisture longer and might be better suited for plants that require a more humid environment. The size of the container is also important; a pot that is too small can restrict root growth, while one that is too large may lead to over-watering issues. Additionally, adequate drainage is essential to prevent water from pooling at the bottom of the container, which can cause root rot and other health problems for the plant. Therefore, when choosing containers, it's important to consider the specific needs of each plant to ensure they thrive.
Selecting Plants for Your Container Garden
- Sunlight Requirements: Consider how much sunlight your container will receive daily and choose plants that thrive in those conditions.
- Growth Habits: Pay attention to the growth habits of the plants, including their mature size and speed of growth, to ensure they won't overcrowd each other.
- Compatibility with Other Plants: Select plants that are compatible in terms of water, soil, and light needs to ensure they can grow well together in the same container.
- Seasonality: Consider the seasonality of the plants to ensure your container garden remains vibrant and colorful throughout the growing season.
- Water Requirements: Choose plants with similar water needs to make watering more straightforward and to prevent overwatering or underwatering any of the plants.
- Soil Type: Select the appropriate soil type for the plants you are choosing, as some may require more drainage or specific soil conditions to thrive.
Soil and Fertilization Tips
For container gardening, choosing the right type of soil and adopting effective fertilization methods are crucial for promoting healthy plant growth. The best soil for this purpose is a well-draining, nutrient-rich potting mix designed specifically for container plants. This type of soil ensures that water reaches the plant's roots without waterlogging them, while also providing a balanced mix of nutrients that are essential for growth. Fertilization plays a key role in supplementing the soil's nutrients, especially since plants in containers can deplete the available nutrients more quickly than those in the ground. A regular feeding schedule with a balanced, water-soluble fertilizer can help maintain optimal nutrient levels. It's important to follow the recommended dosage and frequency to avoid over-fertilization, which can harm plant health. Together, the right soil and proper fertilization practices lay the foundation for thriving container gardens.
Watering Strategies for Container Gardens
Properly watering plants in container gardens is crucial for their health and growth. The frequency of watering depends on several factors including the type of plants, the size of the container, and the current weather conditions. As a general rule, most container gardens need watering once a day during hot, dry periods and less frequently during cooler, cloudy days. The best time of day for watering is early in the morning or late in the afternoon to minimize evaporation and allow the water to soak deeply into the soil, reaching the plant's roots. To check for adequate moisture levels, stick your finger about an inch into the soil. If the soil feels dry at that depth, it's time to water. Remember, over-watering can be just as harmful as under-watering, so ensure proper drainage and avoid letting plants sit in excess water.
Creative Design Ideas for Container Gardens
Container gardens are a versatile and exciting way to bring more greenery into both outdoor and indoor spaces. Experimenting with different plant combinations, container styles, and placements can significantly enhance the aesthetic appeal of your home or garden. Here are several innovative ideas to inspire your next container garden project:
- Vertical Arrangements: Utilize vertical space by stacking containers or using wall-mounted planters. This is especially effective in small areas, allowing you to grow more in limited space.
- Repurposed Containers: Think outside the box by using unconventional items as plant containers, such as old boots, teapots, or even repainted tin cans. This adds a unique charm and character to your garden.
- Edible and Ornamental Combos: Mix edible plants like herbs and vegetables with ornamental flowers for a garden that is both beautiful and functional. This combination can also help deter pests naturally.
- Unified Color Themes: Choose plants and containers that adhere to a specific color scheme for a cohesive and visually appealing look. For example, a monochromatic theme or complementary colors can create a striking visual impact.
- Succulent Sculptures: Create a low-maintenance garden by arranging succulents of various shapes, sizes, and colors into artistic designs. These can be particularly eye-catching and are perfect for dry climates.
- Layered Landscapes: Use containers of different heights to create a multi-layered effect, mimicking a natural landscape. This can add depth and interest to your garden or patio space.
- Seasonal Updates: Change your plantings with the seasons to keep your container garden looking fresh and timely. This allows you to experiment with a wide variety of plants over the course of a year.
- Themed Gardens: Design your container garden around a specific theme, such as a butterfly garden, aromatic herb garden, or a tropical paradise, to bring a slice of your favorite environments into your home.
With these ideas in mind, don't be afraid to get creative and personalize your container garden to reflect your style and space. Happy gardening!